# Roles
In Krayin CRM, roles typically refer to predefined sets of permissions and access levels that determine what actions users can perform within the system.
These roles help to manage and control the level of access granted to different users based on their responsibilities and job functions.
# Create Roles in Krayin
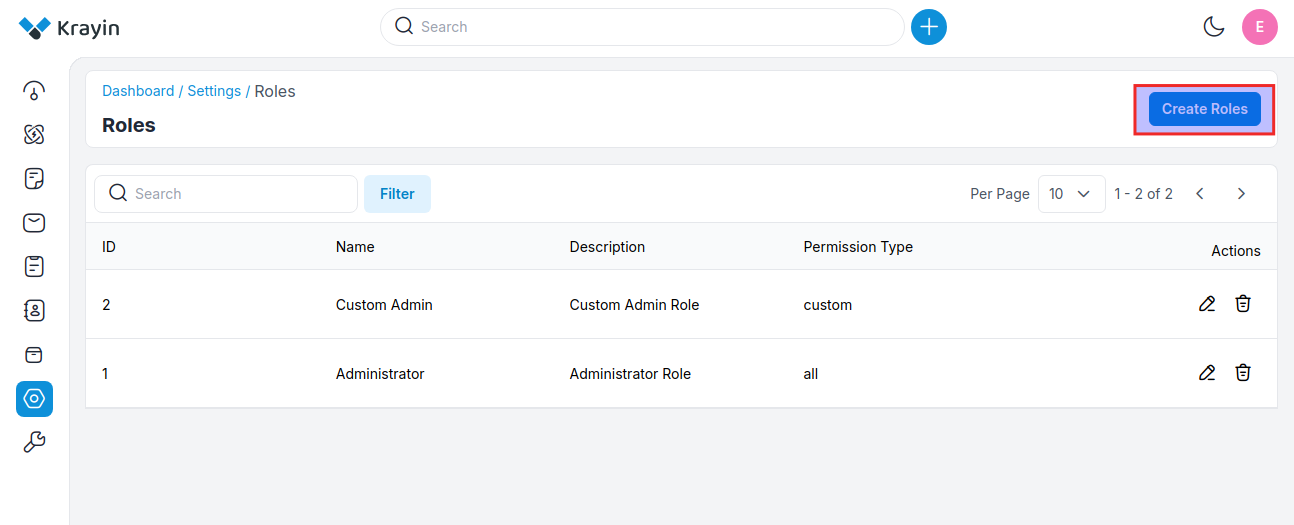
Step-1 Go to admin panel of krayin and click on Settings >> Roles >> Create Role as shown in the below image.
Step-2 Add the details below
1) Name- Enter the name of the role.
2) Description- Enter the description of the role.
3) Permissions- Two permission types are mentioned below.
a) Custom- Custom permissions are specific to the needs of the application or organization. They can be created and assigned to roles as required.
For instance, in an e-commerce platform, custom permission might be "Manage Orders" or "View Analytics". These permissions would be assigned to roles based on the responsibilities of the users within the system.
b) All- When a user or role is granted "all" permissions, it means they have unrestricted access to all resources and actions within the system. This is often reserved for superuser roles or administrators who need full control over the system.
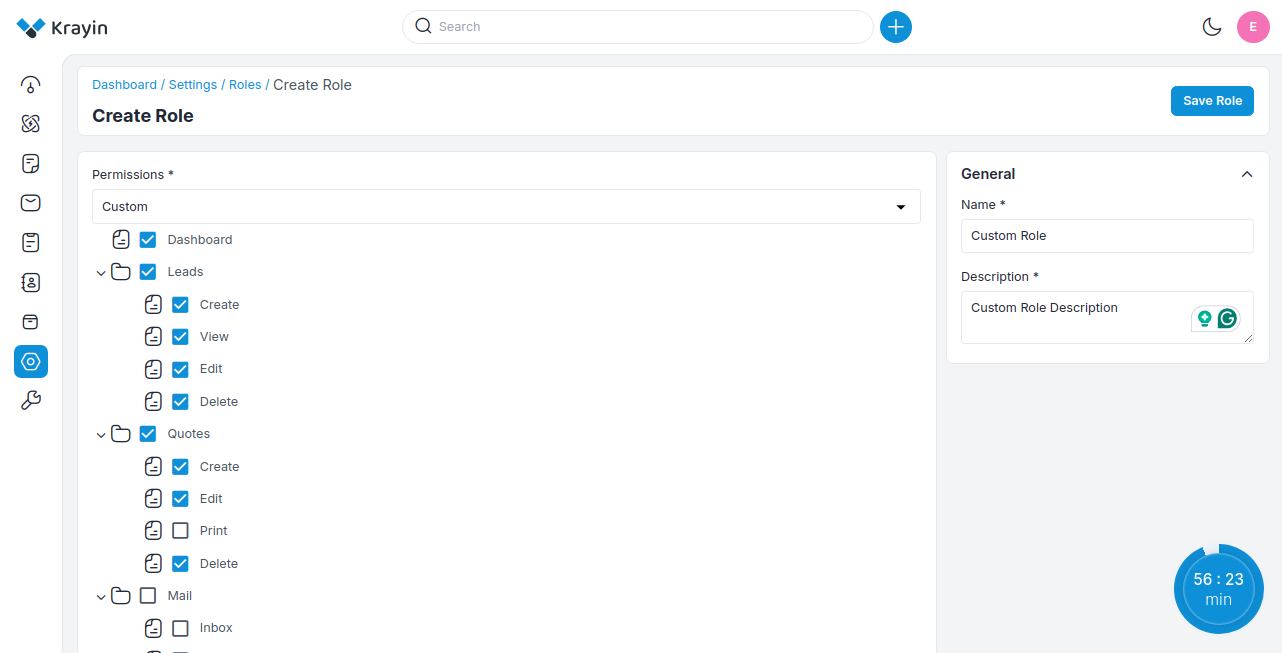
Now click on Save as Role button.
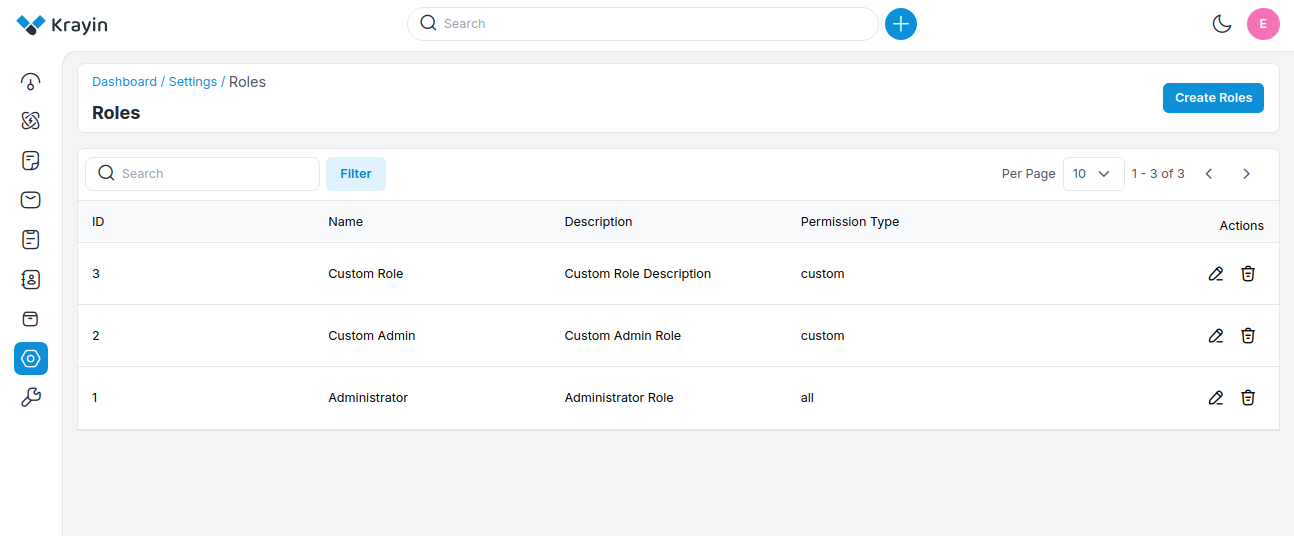
Step-3 A new record is created in the role data grid as shown in the below image.
# Edit Roles
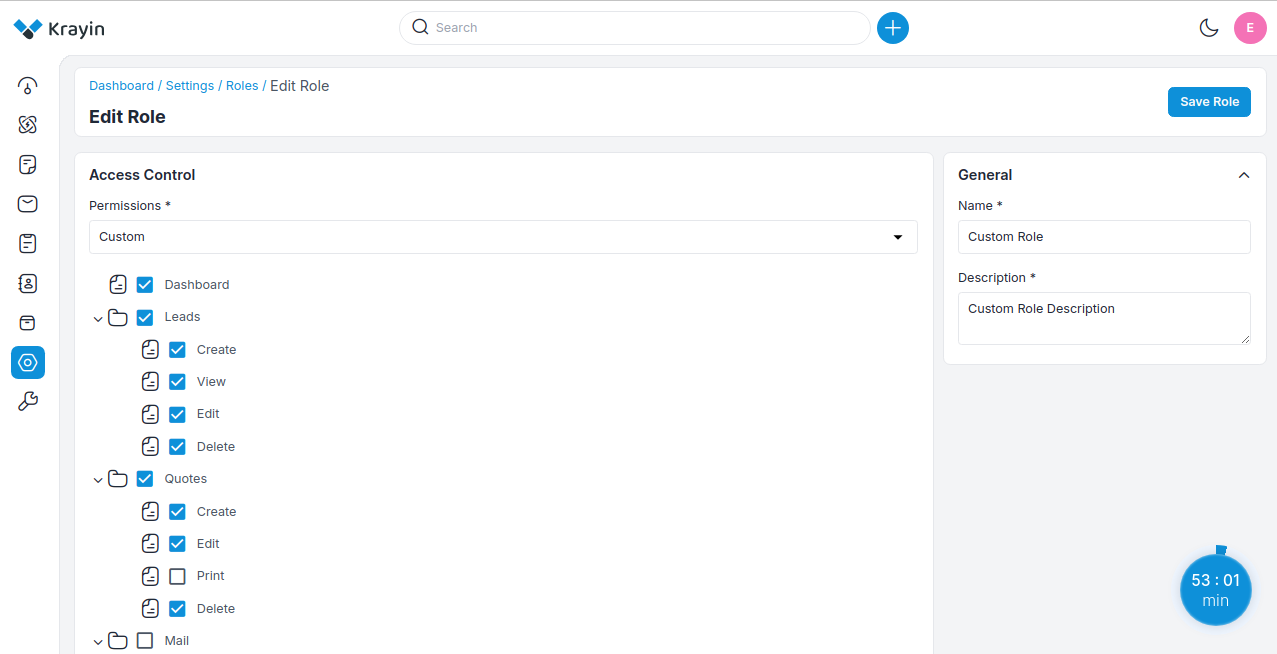
You can modify or Edit Roles in Krayin CRM, whenever you need or changes your organization’s hierarchy level.
You can rename the Role, and change the Description and Permission type as well.
# Deleting Roles
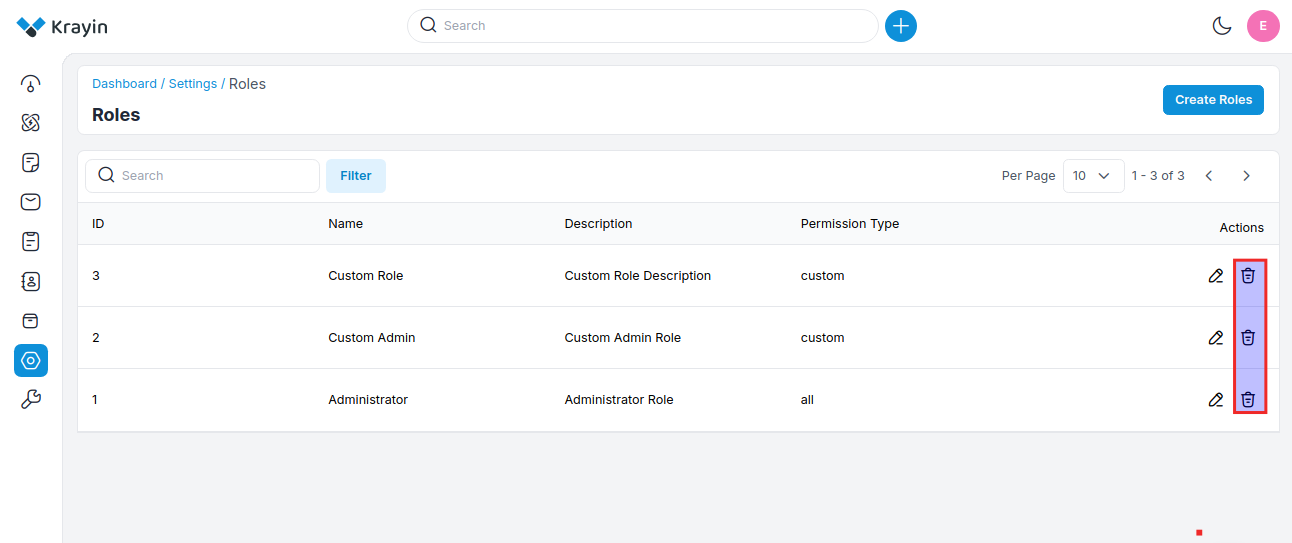
If you want to delete unnecessary roles from your Krayin CRM, in the action click on Delete button, as shown in the below image.
# Use of Filter in Roles
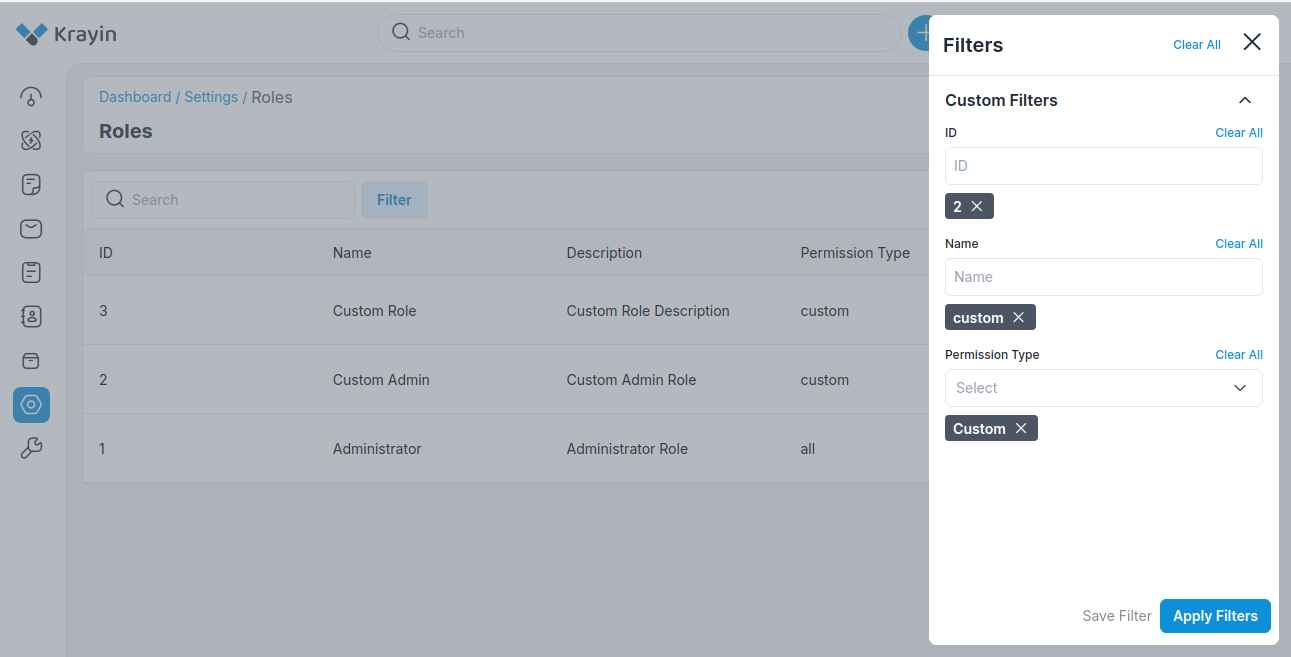
After creating roles, you can use a “Filter” to find out the specific role by using Id, Name & Permission Type.
NOTE- These Roles will be visible while creating a User.
By following the above steps you can easily create roles in Krayin CRM.
